Sunday, October 31, 2010

Happy Halloween!

Hi there! I present to you my Happy Halloween Happy Face Belly Pumpkin!
So as you can see I decided to make my belly look like a happy pumpkin to get into the spirit of Halloween. I know my baby is not born yet but it doesn't mean she can't celebrate with everyone else. Anyways I hope you guys like my happy pumpkin and that you all have a safe, wonderful Halloween!
I used a bunch of my NYX Jumbo eye pencils. Coastal Scents 88 palettes, and MAC Melon pigment.
Well till next time! Take care! Hope you all get lots of candies. =D

Wednesday, October 27, 2010

Demo & Review Face Secrets Professional Oil Absorbing Blotting Papers

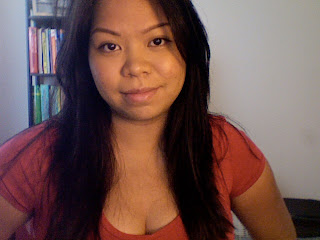
Hi there! So here I am again, presenting you with information on a product that is truly a diamond in the rough especially for those with oily skin! Above is a picture I took of myself around 10 am this morning. I had just finished getting ready for class and my makeup is freshly applied.
Now, 9 hours later (7 pm Eastern Standard Time)...you can see that I have become oily enough to fry an egg! Yucky!
The Product: Face Secretes Professional Oil Absorbing Blotting Papers

Quantity: 150 blotting papers

The Price: $2.99

Coming to the rescue is my Face Secrets Professional Oil Absorbing Blotting Papers that I purchased at Sally's Beauty Supply for $2.99!!!! You get 150 blotting papers contained in a sturdy, plastic (purple) container.
PROS: The product promises to remove excess oils and dirt without disturbing makeup, prevents oxidizing of makeup (turning orange), and overall it keeps your makeup looking fresh! I love how the papers come in a convenient envelope-style packaging. Oh and the price for the quantity is simply a STEAL in my opinion!

CONS: Null! I can't possibly think of anything negative to say about this product (except maybe that the product's name is too long! haha). It does what it's suppose to and does a good job at it.

To Repurchase or Not to Repurchase: uh...yeahhh!!!

So here is a quick picture demo of me using this product. I must warn you that I get really oily soooo....yeah....you will be surprise at the amount of oil that is absorbed by these magic sheets!


Ewwwwwww!!! Look at all the oil..it actually made the paper transparent! I told you this stuff is great!
Excess oil (aka sebum) is bad because it acts as a plug to your pores. This combined with dead skin attracts bacteria and thus a blemish is conceived! 
The paper was actually sticking to my cheeks! lol
Gurrrllll....that's a lot of oil!
Ah...now my pores can breathe! As you can see my makeup remained intact. My foundation did not smear at all or rub off and transfer to the blot papers.

Hope this review was helpful! Until next time....adios amigas!

Tuesday, October 26, 2010

FOTD: Dramatic Fall Look

So here is an in yo' face pic!!! Gosh my face has gotten so chubby lookin' which comes to no surprise because I am currently carrying a growing baby in my belly...hahahaha

Anyways I really like how this FOTD turned out. It's very far from the looks that I have been sportin' these days. I guess I got a little bored and went makeup crazy! So much makeup so little time! to add to the crazy I was feeling hyper after devouring a bag of m&m's.
Products used are. . .

FACE: MAC Strobe Cream, MUFE HD Foundation Shade# 153, Chanel Poudre Universelle Libre in 30 Naturel - Translucent 2

EYES:
I used NYX Jumbo e/s pencil in Rust as my base for the lid area and then used MAC Beig-ing shadestick for my brow bone and tear duct area.

1) MAC Idol Eyes e/s for the inner corner/tear duct area

2) MAC e/s White frost for the inner half of bottom lash lines and also for the brow bone highlight

3) Urban Decay e/s in Toasted for the middle eye lid area

4) Urban Decay e/s in Hustle for the outer corner/crease area/outer half of bottom lash lines

5) Urban Decay e/s in Perversion on the outer v.

I used MAC fluidline in Blacktrack for my top lash lines (dramatically winged out) and also for the outer half of my bottom lash lines (which was set with the UD e/s Hustle)

CHEEKS: I used The Body Shop Blushing Daisies 01 to highlight my nose bridge, top of of cheek area, forehead, chin, and a bit on my cupid's bow. For my cheeks I used The Body Shop Blushing Daisies 02.

LIPS: MAC Tricolour Lipglass in Just Dessert

BROWS: MAC brow shader in Soft Charcoal

I gotta do some homework today and study for my exam tomorrow. I really don't feel like doing it but oh well no point in procrastinating the inevitable...Ta-ta for now ladies! Muahs!

Friday, October 22, 2010

Simple FOTD & Belly Shots!

So today I did a very simple makeup look...just using a few products and keeping it very low key.
I look very tired these days which is normal because YES I am proud to say..that I am only 9 more weeks away from my due date (although I feel like I may be delivering by the 37th week). My baby is currently moving as we speak! It makes me so excited and at the same time I am anxious to see her.
As for my uber minimalist look today..I just used the following products.

FACE: Bosia Moisturizer w/ SPF, NARS Makeup Primer, & MUFE HD Foundation #153
I skipped on setting powder because I wanted a more dewy look and I currently have some dry areas on my face so skipping the powder really helped to avoid any cakeyness.
I also opt out on using any concealer because although I have redness, the MUFE HD Foundation has enough coverage to even out my skin color.

CHEEKS: Tarte Cheek stain in Flush
I really like this cheek stain because it gives a nice, naturally flushed cheeks. Every time I use it, my husband always compliments on how rosy my cheeks look (on those cold days). I highly recommend this product!

EYES: Urban Decay 24/7 Glide On Eye Pencil in Zero
I used this for my upper lash lines and for tight lining. It really gave my tired eyes the umph that it needed, making them look naturally vibrant and awake. I extended the liner a bit towards the outer corner, but not flicking the line or making it like a cat eye. I skipped on mascara because the tight lining already made my lashes look fuller.

BROWS: MAC Brow shader in Soft Charcoal
Filling in my brows is a MUST for me. I very rarely leave home without doing this one particular makeup routine because it really defines my eyes, especially when I'm wearing my glasses.

That's pretty much all I did for my super easy, on the go makeup today. Now here are a couple of belly shots just for you! Enjoy! ^_^


Take care and I hope you have a great weekend!

Tuesday, October 19, 2010

Clinique Even Better Review


The Product: Clinique Even Better Dark Spot Corrector

Size: 1 Fl. Oz.

The Price: $49.50
 
Back in March 22, 2010, I purchased the Clinique Even Better Dark Spot Corrector. I finished the 1 Fl. Oz. container within 3 months, applying it twice a day, once each morning and night. This product was a bit pricey, retailing at $49.50 and promises a significant reduction in acne scars.
PROS: Comes in a hygienic pump container. Works well with other Clinique products.

CONS: I have combination skin. I have dryness on certain areas of my face and I do get oily on my t-zone area. I noticed that using just the dark spot corrector does not provide my skin with enough moisture so the moisturizer was a must have for me. The price is not practical for something that may take one or two bottles to work. It does not contain SPF.

The Verdict: For a product that costs $49.50 (before tax) you want it to deliver results. I am sad to say that after finishing the whole container of the Even Better Spot Corrector, I HONESTLY did not see any improvements in the appearance of my acne scars. Perhaps, it takes more than one container to do the job but for the $50 spent I really expected to at least see a smidgen of difference.

 
I used the Clinique Even Better Dark Spot Corrector along with the Even Better Moisturizer that I received as a GWP (gift with purchase) in hopes that it will add an extra boost of effectiveness towards diminishing my acne scars.

As you can see I barely finished the small tub of moisturizer because a little of this goes a long way. If you put too much, it does leave your skin a bit greasy so be cautious of the amount you put on. This moisturizer does not have any SPF either so I suggest using another product with SPF to put on top of this, if you are going outside. 

To Repurchase or Not to Repurchase: No, I would not. I am an avid Clinique user and believer but this just didn't do it for me. This is probably one of those products that I would definitely put on the shelf labeled..."Don't believe the hype." I really wanted this product to work for me because of the money spent but it was definitely a lesson learned that you don't always get quality just because the product is a little pricey. 

One thing that I want to emphasize is that everyone is different so my experience may be completely different to yours. Just because it didn't work for me doesn't mean it won't work for you. I suggest trying to get a hold of GWP or maybe just asking a Clinique representative if they can give you a free sample.

 A similar product that I've tried is this Proactiv Skin Lightening Lotion. I'm not sure how much this would retail if purchased on it's own because I got this along with my Proactiv kit. QVC is selling it for $21.75. 
It has 2% hydroquinone which is the active ingredient. Hydroquinone was actually banned by FDA back in 2006 because they found some evidence that it can act as a cancer causing chemical. After finding this out, I completely stopped use right away that's why the tube still looks new with about 90% of product still remaining in the tube. I can't do an in dept review on this product since I barely used it but there are mix reviews of positives and negatives about this product out in the internet.

I hope this review helps out many of you who are curious about any of the above products. Please feel free to comment or ask questions.


Blogger Template Designer: Jason Morrow

URL: jasonmorrow.etsy.com